| Bookmark Name | Actions |
|---|
Pay a Bill
Use the feature to initiate a bill payment, view the list of registered bill payees, view the past history of bills paid to a company or service, create a new bill payee account on the go, update the bill payee details or delete the bill payee account, view a list of the due bill payments as well as bill payments scheduled for a later date, and modify or cancel a pending bill payment. You can also view an e-bill or activate/deactivate the e-bill viewing feature.
Menu path: On the top menu > My Bills
When you open the Bill Pay main screen for the first time, the application displays the terms and conditions for you to activate the bill pay service. Click Accept to activate bill pay for your account. You must also select the default preferred account for paying bills, which can be modified later if required.
NOTE:
- Accounts are segregated by personal and business type at all relevant places in the application during transfers and other flows and icons against each account indicates the type of account.
- Only those users with permission to create Bill Pay transactions can initiate a Bill Payment.
- Only those users with permission to manage recipients for the bill pay service can add/manage recipients.
- Users can initiate bill payments only from those accounts to which they have access.
- Users can Edit / Cancel scheduled payments only if they have the required permissions.
- The payee list and history of bill pay are displayed to all business users under the same company/business.
- A combined user with access to both business and retails accounts, can activate/deactivate e-bills for any of the payees based on the permissions that are assigned to the user.
- When signed in as a combined user, the payees list has personal and business payees with appropriate icons to determine the type of payees and user can filter the personal and business payees.
- A combined user with access to both business and retails accounts, can activate/deactivate bill pay service based on the permissions that are assigned to the user.
- See Permissions for more information.
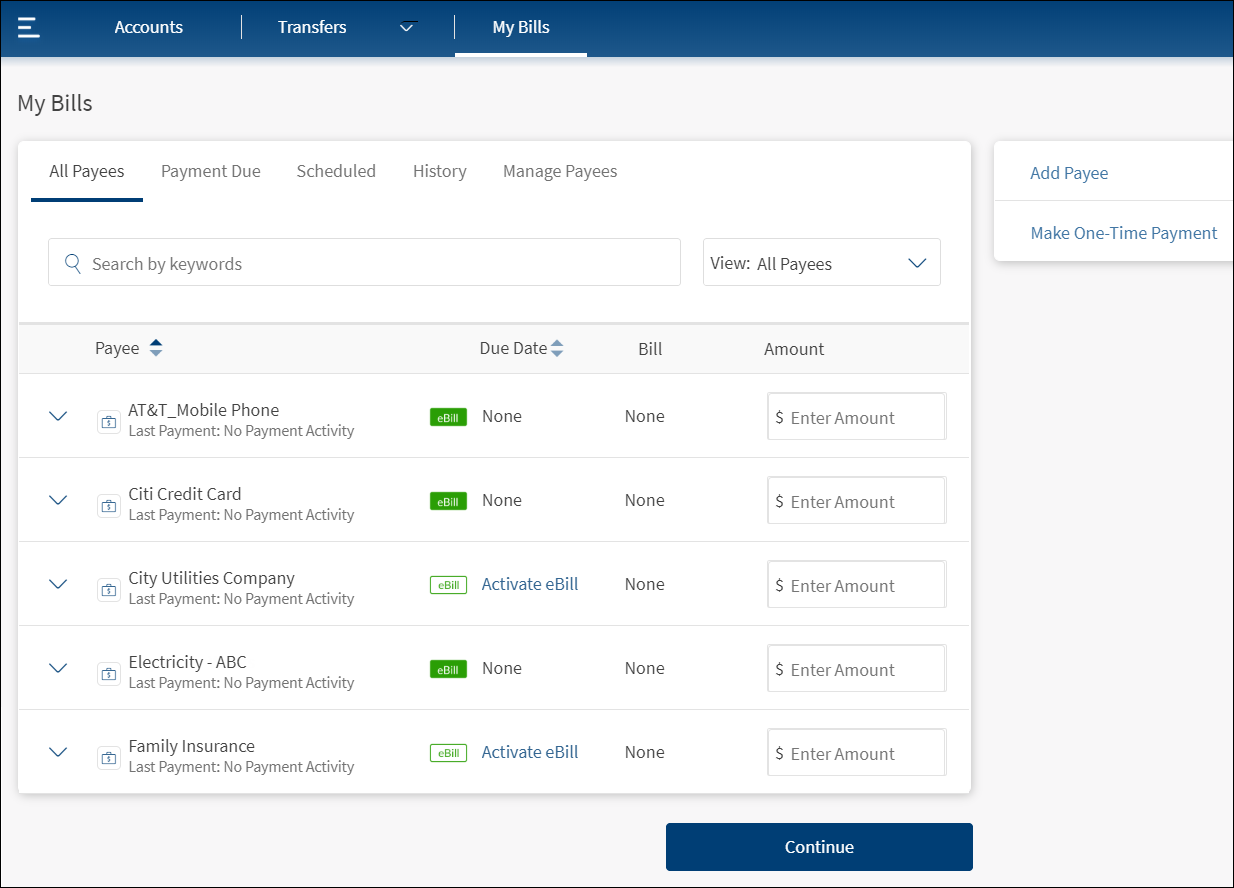
The application displays the following information as tabs under My Bills. By default, the All Payees tab is selected. The payees are
- All Payees. Click to view the details of all saved bill payees. Expand any bill payee to make a new bill payment to that payee. The app represents active e-bill payees in green and inactivates e-bill payees in white. Click Activate available beside the inactive e-bill icon if you want to enable the e-bill feature for the required payee. You can view the current month's bill when you click the green e-bill icon and pay the bill immediately. You can view all the previous e-bills using View Activity in manage payees tab.
- Payment Due. Click to view the details of due bill payments. Expand any bill payee to make a new bill payment to that payee.
- Scheduled. Click to view the details of scheduled bill payments. Click any scheduled transaction to view its in-depth details and perform applicable actions.
- History. Click to view the details of past bill payments. Click Repeat to make another bill payment to the same bill payee.
- Manage Payees. Click any bill payee to perform the required action, such as pay bill, view activity, edit, activate/deactivate e-bills, or delete the bill payee.
Search Payees
Use the search option to search for specific payees by entering the keywords to narrow down the search, or user the filter list to filter the payees based on the selection - All Payees, Personal Payees, Business Payees. The list items depend on the type of signed in user. A combined user with access to personal and business accounts can see personal and business payees.
All Payees
Use the feature to view the details of all saved bill payees.
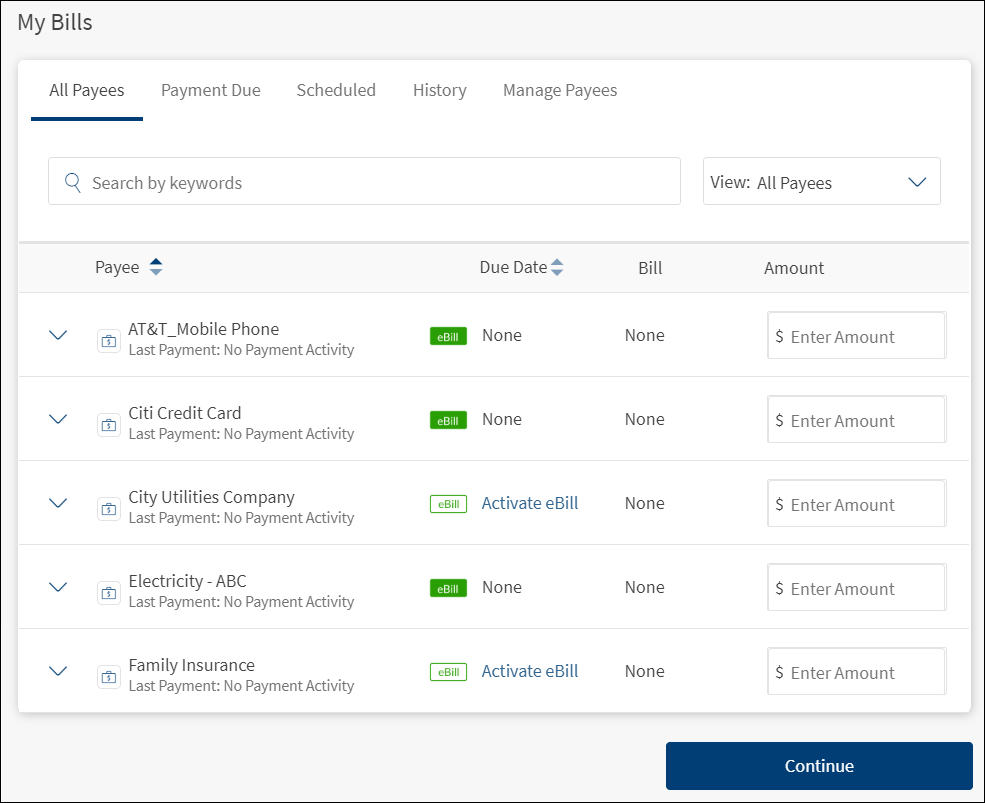
The screen displays the following details:
- Payee
- Due Date
- Bill Amount
- Action that you can perform on the payee record - Payment Amount
Click the down row beside a payee record to view the details of the payee. The following details are displayed.
- Pay From
Other actions you can do:
- Total e-Bill Amount Due. Number of bill payments due and the total amount of those bills.
- Add Payee. Click Add Payee to add a new bill payee account.
- Make One Time Payment. Click Make One Time Payment to initiate a bill payment on the go either to a new or saved bill payee.
- Bulk Payment. Select the required payees and pay multiple bills at the same time when you initiate a bill payment.
Feature Actions
Within the Bill Payment feature, various feature actions are available. The following are the revised feature actions.
| Feature Action | Description |
|---|---|
| Activate /Deactivate Bill pay | This single action is associated with permission for user to accept the Terms and Conditions and activate/deactivate Bill Pay service for his profile. |
| Bill pay Activate /Deactivate E-Bill | This single action is associated with permission for activating and deactivating e-Bills for payee who support the service. |
| Approve Bill Pay | This action is associated with permission for approving the bill pay transaction. |
| Approve Self Initiated Bill pay | This action is associated with permission for self -approving the bill pay transaction. |
| Bill Pay Create Payees | This action is associated with permission for creating a new payee and update a payee details. |
| Bill Pay Delete Payees | This action is associated with permission for deleting an existing payee. |
| Bill Pay View Payees | This action is associated with permission for viewing the list of registered bill payees. |
| Bill Payment Services | This action is associated with permission for making a bill payment. |
| View Bill payments | This action is associated with permission for viewing past history of bills paid to a company. |
| Bulk Bill Pay | This action is associated with permission for initiating multiple bill payments to several billers/e-billers added as payees. |
Configuration
- The visibility of each feature is controlled through the permissions defined for the user. See permissions for more information. The permissions at user levels are defined during user creation and while editing the user details after the user is created. In case the user does not have access to any of the features, that option will not be visible on the form and on the menus. The permissions at the company level and role level are defined in the Spotlight application.
- The elements on the screen depends on the user account type and the permissions to access features and perform associated actions.
- The capability to revoke or restore the features is available in the Spotlight application.
- The Feature/Role/Company level transaction limits for recurring, nonrecurring, non-scheduled, and scheduled transactions are managed in the Spotlight application. User level limits can be managed in Spotlight and the customer-facing application.
Add Bookmark
save your best linksView Bookmarks
Visit your best links BACK
BACK


Are you sure you want to log-off?